If you’ve read my other posts, you know I’m in LOVE with what doing barbell squats has done to my backside. I went from a flat, droopy, mushy bum to a round, high and firm booty. See?

However, when your bum is no longer flat, droopy or mushy, you do run into problems finding clothes that fit properly. If they fit in the ass, hips and thighs, they gap at the waist. Oh, I know… what a hardship! I have a curvy body and small waist. I better stop lifting weights! NOT.
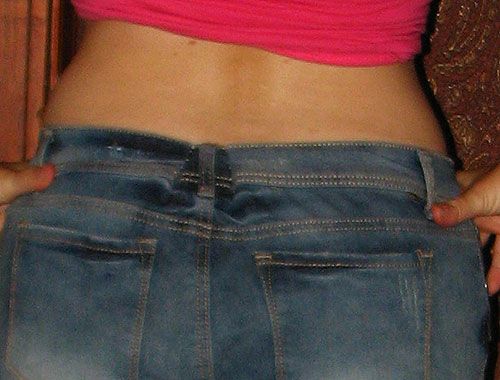
Here’s a pair of shorts I just bought for an upcoming costume event… I don’t typically wear shorts THIS short. Even though I’m normally a size 4 or 6, I had to buy these in a (juniors size) 13 to fit my backside and not cut off circulation to my legs. And they gap at the waist.
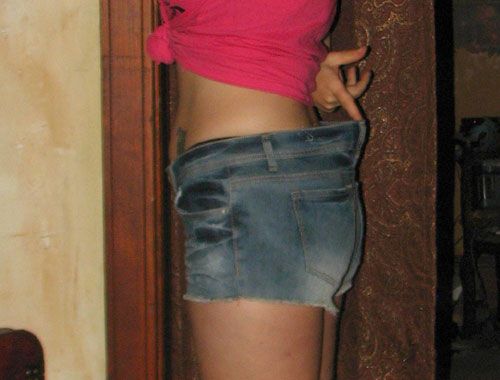
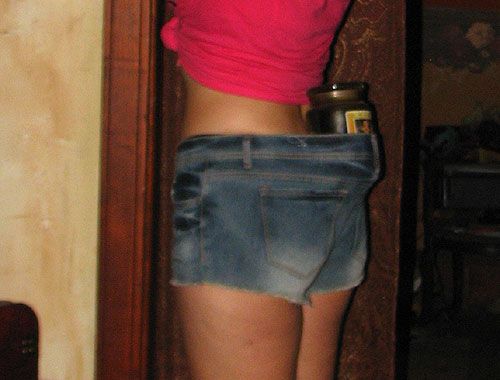
They gap so badly that I could carry a large jar candle back there.
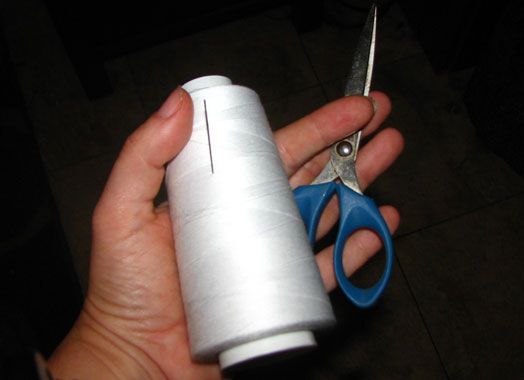
Don’t despair. The solution is simple. It’ll take about 10 minutes and all you need are a needle, thread, and pair of scissors. And the scissors are only for cutting the thread. You don’t need that much thread, a small spool will do, and you’ll want something that better matches your fabric, but I wanted the stitches to show for the purpose of this demonstration.
All you need to do is make two small darts in the back of the waistband. A dart is a fold in the fabric used to give a garment dimension. Many fitted blouses will have darts and seaming to give you room for boobies and shape at your waist. The problem with many pants is that they’re cut at an angle to allow for the width of your hips, but they don’t have structure and shaping for the roundness of a shapely tushie. So you’ll have to create them.
First, decide where you want them. I’m putting mine in the back near the middle belt loop. Also have a rough idea of how much smaller you need the waist. I didn’t want these so tight that they’d give me a muffin top, so I figured about three inches should do. Each fold is about 3/4 of an inch deep, so each dart takes in about 1.5 inches. Times two is three inches.
If you’re working on regular clothes, not a pair of cheap costume shorts, you’ll want to plan it better, and maybe even use a washable marker to outline where you want your darts to be, and pins to hold it in place. All the stuff they taught you in Home Ec class. Do they even still teach sewing in school? They should. No one should need to pay someone to sew a button back on a shirt.
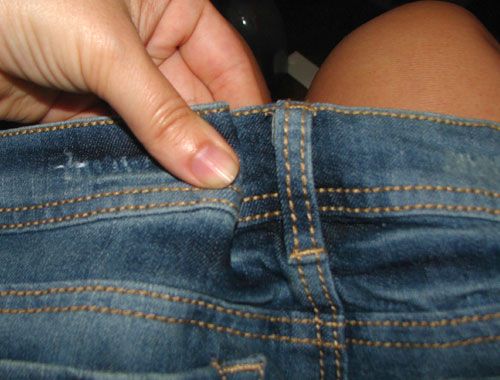
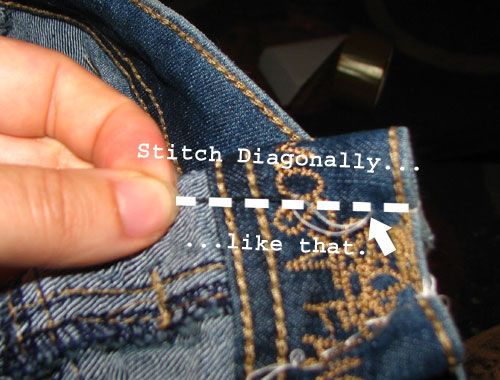
Next step, start sewing. You’ll want to sew at a diagonal line (which I show better in another photo) so that the top near your waistband is a larger fold of fabric, and it tapers down to nothing at the end by your bum.
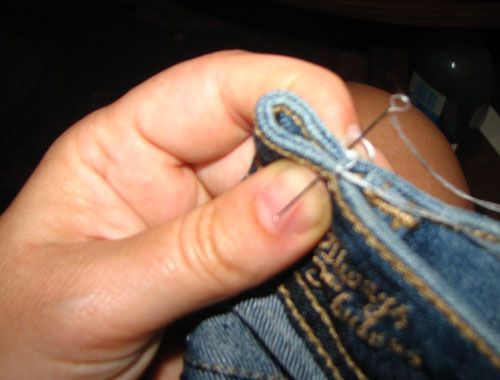
You’ll repeat the same thing on the other side. At the waistband, your darts will look like little bunny ears.
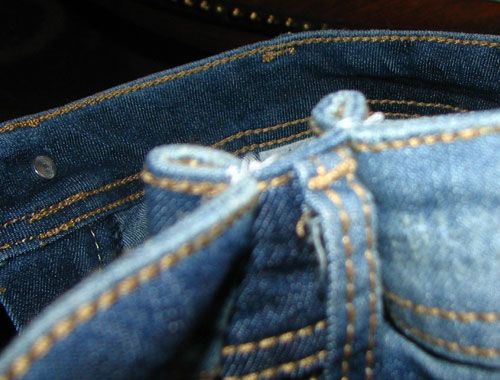
Here’s a better photo of the shape of the dart. It starts wide at the waistband, then goes diagonally. I sewed from top to bottom, did a few more stitches to reinforce the bottom, then back up to the top.
This is how it will look from the back when it’s done. Yes, it’s visible, but chances are, if someone is this close to your backside, they’re more concerned about getting IN your pants than any alterations that might have been made TO the pants.
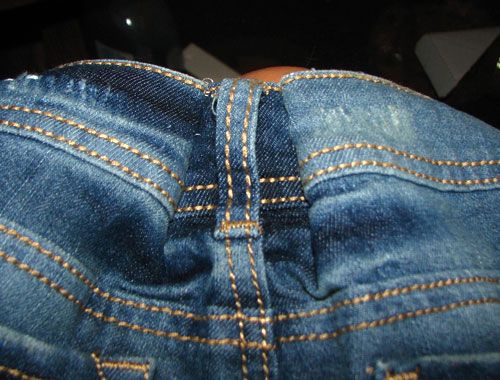
Once they’re on, it’s even less visible, and would be less visible still if these shorts were a uniform wash and didn’t have so much variation in color.
And from the side, no more gap! Yay!

So, instead of complaining about clothes not fitting right, realize that clothes are made to fit the widest variety of body shapes, but they can be easily changed to fit your individual shape. Ignore the size on the tag, and buy what fits the largest part of your body. If you don’t have the money to spend to get something professionally tailored, buy some needles and thread and try it yourself. An alteration like this requires no permanent change to the garment. If it doesn’t work, just snip your stitches and start over.


